Master the installation of your Signal-Stat 900 series turn signal switch with our comprehensive guide on the 900 Sigflare Wiring Diagram. Learn key components, step-by-step installation, and common issues to ensure a successful and safe installation.
Understanding the 900 Sigflare Wiring Diagram
The 900 Sigflare Wiring Diagram is a crucial document for anyone looking to install or repair the Signal-Stat 900 series turn signal switch. This diagram provides a detailed visual representation of the wiring connections, ensuring that the installation process is accurate and efficient. It is essential to consult this diagram before starting any work to avoid potential electrical hazards and ensure proper functionality of the turn signals and hazard lights.
Key Components of the 900 Sigflare Wiring Diagram
The 900 Sigflare Wiring Diagram typically includes several key components such as the switch, wires, and connectors. Each component has a specific function and must be connected correctly to ensure proper operation. The diagram will show the color-coding of the wires, the type of connectors used, and any additional components required for the installation.
Step-by-Step Installation Guide
Following the 900 Sigflare Wiring Diagram is crucial for a successful installation. The process typically starts with mounting the switch on the steering column, ensuring a good ground connection. Next, the wires are connected according to the diagram, and any additional components such as the flasher unit are installed. It is important to double-check all connections to avoid any electrical issues.
Wiring Connections
The 900 Sigflare Wiring Diagram provides detailed information on the wiring connections. This includes the color-coding of the wires, which is essential for ensuring that the correct wires are connected to the correct terminals. The diagram will also specify the type of connectors used and any additional wiring requirements.
Common Issues and Troubleshooting
Even with a detailed 900 Sigflare Wiring Diagram, issues can arise during the installation process. Common problems include faulty wiring connections, incorrect installation of components, and issues with the flasher unit. Troubleshooting these issues requires careful inspection of the wiring and connections to identify and correct any mistakes.
Tools and Materials Needed
To successfully install the Signal-Stat 900 series turn signal switch using the 900 Sigflare Wiring Diagram, you will need a variety of tools and materials. These include wire strippers, pliers, screwdrivers, and electrical connectors. Additionally, you may need a multimeter to test electrical connections and ensure they are secure.
Conclusion
By following the 900 Sigflare Wiring Diagram and using the appropriate tools and materials, you can ensure a successful installation of the Signal-Stat 900 series turn signal switch. This diagram serves as a comprehensive guide, providing detailed information on wiring connections, common issues, and troubleshooting steps. It is essential to consult this diagram before starting any work to avoid potential electrical hazards and ensure proper functionality of the turn signals and hazard lights.
Are you struggling to find the right wiring diagram for your 900 Sigflare turn signal switch? Look no further The 900 Sigflare is a popular choice among classic car enthusiasts, but its wiring can be complex. In this article, we will guide you through the process of installing and wiring your 900 Sigflare switch, ensuring that your turn signals and hazard lights function correctly.
Whether you're a seasoned mechanic or a DIY enthusiast, understanding the wiring diagram is crucial for a successful installation. We will provide step-by-step instructions and highlight key points to help you navigate the process. From mounting the switch to connecting the wires, we will cover everything you need to know to get your 900 Sigflare up and running smoothly. Stay tuned for a comprehensive guide that will make your 900 Sigflare installation a breeze.
How can I troubleshoot a non-functioning pilot light on a Series 900 switch
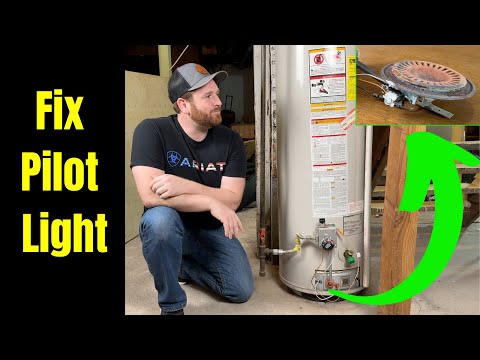
- Check for a Good Ground: Ensure there is a solid ground connection between the switch and the steering column. A poor ground can prevent the pilot light from functioning properly. If necessary, run a separate ground wire from the anchor clip to the chassis for a reliable connection.
- Inspect Wire Colors and Locations: Verify that the wires are correctly connected to the appropriate terminals. The pilot light is typically connected to the "P" (pilot) terminal, while the load is connected to the "L" (load) terminal.
- Check for Shorts: Inspect the wiring for any shorts where the wires are spliced. Shorts can cause the pilot light to malfunction.
- Replace Pilot Bulbs: Ensure that the pilot bulb is not defective. Replace it with the correct type for your vehicle's voltage (e.g., #51 for 6V, #53 for 12V, or #356 for 24V).
- Check the Flasher: If the pilot light does not flash, it could indicate a problem with the flasher. Use a 3-terminal flasher and ensure the correct connections: "P" for pilot, "L" for load, and "X" for power from the battery.
- Consult the User Manual: Refer to the user manual for specific troubleshooting guides and diagrams. The Signal-Stat 900 Series Trouble Shooting Guide provides detailed instructions for common issues.
What are the steps to replace a pilot bulb in a Series 900 switch

- Remove the Top Cover: Take off the top cover of the switch by removing two screws. This will give you access to the pilot bulb assembly.
- Disconnect the Pilot Bulb Assembly: Pull the Spring Clip away from the handle to disengage the pilot bulb assembly from the handle.
- Remove the Old Bulb: Carefully pull out the old pilot bulb from its socket.
- Install the New Bulb: Insert the new pilot bulb into the socket, ensuring it is securely seated.
- Reassemble the Pilot Bulb Assembly: Reattach the pilot bulb assembly to the handle by pushing the Spring Clip back into place.
- Reattach the Top Cover: Replace the top cover and secure it with the two screws you removed earlier.
- Test the Pilot Light: Ensure the pilot light is working correctly by testing it after reassembly. If the pilot light does not flash, check for a good ground connection and ensure the flasher is functioning properly.
What tools do I need to replace the pilot bulb in a Series 900 switch
- Torx Screwdriver: For removing the top cover screws.
- Pilot Bulb Assembly Removal Tool: To disengage the pilot bulb assembly from the handle.
- Socket Wrench: For removing any additional screws that may be holding the switch in place.
- Wire Strippers: To strip any wires that may need to be connected or disconnected.
- Test Light: To ensure the pilot bulb is working correctly after replacement.
- Electrical Terminal Pliers: For making new connections to the pilot bulb.
- Heat Shrinking Waterproof Butt Connectors: To ensure secure and waterproof connections.
Best keywords for blog articles
Thank you for reading our comprehensive guide on the 900 Sigflare Wiring Diagram. We hope you found the information helpful in understanding and installing your 900 Sigflare turn signal switch. If you have any further questions or need additional assistance, please do not hesitate to reach out. Our team is here to support you in any way we can. Whether you are a seasoned mechanic or a DIY enthusiast, mastering the 900 Sigflare Wiring Diagram is crucial for ensuring your vehicle's safety and functionality. Remember to always follow proper safety protocols when working with electrical systems, and consult a professional if you are unsure about any aspect of the installation process.
As you continue to work on your vehicle, we encourage you to explore more resources and tutorials on our blog. Our goal is to provide you with the knowledge and tools you need to tackle any project with confidence. If you have any feedback or suggestions on how we can improve our content, please share them with us. Your input is invaluable in helping us create the best possible resources for our readers. Once again, thank you for choosing our blog as your go-to source for automotive information. We wish you continued success and satisfaction with your 900 Sigflare Wiring Diagram installation.
What are the key benefits of using a professional voice in blog content
- Enhanced Engagement: A professional voice can captivate and engage the audience, fostering a stronger connection with the message. This is particularly effective in advertisements, corporate videos, and e-learning modules, where a polished and authoritative voice can resonate with the audience.
- Building Trust and Credibility: A professional voice conveys competence and expertise, reassuring the audience that they are in capable hands. This is crucial in industries where trust is paramount, such as finance, healthcare, and legal services.
- Versatility Across Platforms: Professional voiceovers offer unparalleled versatility across various platforms and media, including radio and television commercials, online videos, animations, and interactive content. This adaptability ensures consistency in the brand's voice, promoting recognition and reinforcing brand identity.
- Consistent Brand Recognition: Consistency is key in brand building, and professional voiceovers play a pivotal role in creating a consistent audio identity. When customers hear a familiar voice associated with the brand, it enhances recognition and recall, contributing to a holistic brand experience.
- SEO Benefits: Narrated blog posts can significantly improve search engine visibility. By incorporating relevant keywords naturally into the narration, you can create a powerful signal for search engines, potentially improving the content's ranking for relevant search queries. Additionally, narrated content can enhance user engagement metrics, such as time spent on the page and bounce rate, which are increasingly considered by search engines as measures of content quality.
- Accessibility and Engagement: Narrated blog posts cater to diverse learning styles and can reach a wider audience through voice search. By providing a clear and engaging narration, you can transform your blog posts into dynamic audio experiences that resonate with your audience and propel your content to new heights.
900 Sigflare Wiring Diagram


No comments:
Post a Comment